Perfect Sourdough Bagels in 8 Simple Steps – Foolproof Recipe for All Levels
Make perfect sourdough bagels in 8 simple steps! This foolproof recipe is designed for all skill levels and includes tips for flavor-packed bagels every time
Ingredients
- Flour: Use bread flour for the best chew and structure.
- Sourdough Starter: An active bubbly starter is essential for fermentation and flavor.
- Water: Use filtered water to avoid chlorine interfering with fermentation.
- Salt: Enhances flavor and strengthens dough structure.
- Sugar or Malt Syrup: Adds a slight sweetness and aids in caramelization.
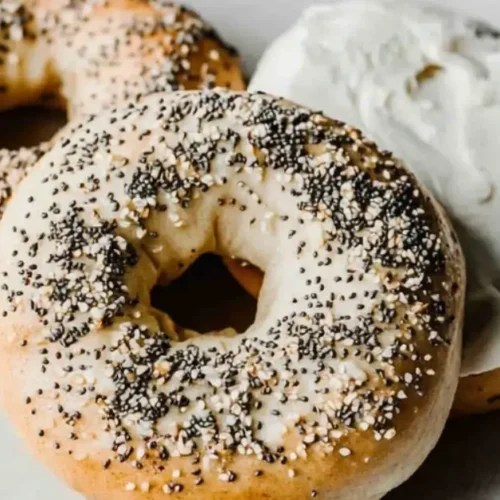
- Optional Add-ins:
- o Seeds sesame, poppy.
- o Dried fruits raisins, blueberries.
- o Spices cinnamon, garlic.
Instructions
- Step 1: Preparing the Dough Mix Ingredients: Combine 500g bread flour, 200g active starter, 250ml water, 10g salt, and 20g sugar. Knead: Knead for 8–10 minutes until the dough is smooth and elastic.Use a stand mixer for efficiency or hand-knead for a tactile experience. Bulk Fermentation: Cover and let the dough ferment for 6-8 hours at room temperature or overnight in the fridge. The dough should double in size and feel airy.
- Step 2: Divide the Dough Preparation: Lightly flour your work surface to prevent the dough from sticking. Dividing: Use a kitchen scale to ensure each piece is 100g for uniform bagels. Using a scraper or sharp knife, cut the dough into eight equal portions. Pro Tip: Cover the unused portions Use a damp cloth to keep them moist while shaping them.
- Step 3: Shape the Bagels Roll into Balls: Take one portion and gently roll it into a smooth ball. Tuck the edges underneath while moving to create surface tension. This helps in creating a firm shape that holds up during baking. Create the Hole: Use your thumb and forefinger to poke a hole in the center of the ball. Stretch the hole gently to form a ring about 2–3 inches in diameter. Remember, the hole will shrink slightly during proofing and baking. Pro Tip: Roll the ring gently on the countertop while pulling it outward for a smooth surface.
- Step 4: Rest the Bagels Resting:Put the shaped bagels on a parchment-lined baking sheet, making sure they have room to spread a bit. Cover and Proof: To prevent the surface from drying, cover the tray loosely with a damp cloth or plastic wrap. Let the bagels rest for 30–60 minutes. During this time, they’ll puff up slightly but won’t double in size. Pro Tip: Proofing longer in a cooler environment (like a fridge) can enhance the bagel’s flavor.
- Step 5: Boil theBagels Prepare the Water Bath: In a large pot, Boil some water and toss in 1 tablespoon. of honey or baking soda. Honey creates a slightly sweet, glossy crust, while baking soda enhances browning and chewiness. Boiling Process: Gently place 2–3 bagels into the boiling water. Avoid overcrowding. Boil each side for 1 minute, flipping with a slotted spoon or spatula. Remove the bagels and let them drain briefly on a cooling rack or paper towel. Pro Tip: Boil the bagels for 90 seconds per side for a thicker crust.
- Step 6: Bake the Bagels Preheat the Oven: Preheat the oven to 425°F (220°C) and adjust the rack to the center position. Topping the Bagels (Optional): Before baking, sprinkle sesame seeds, poppy seeds, or any seasoning over the wet bagels for added flavor and texture. Baking Process: Arrange the boiled bagels on a parchment-lined baking sheet. Bake for 20–25 minutes or until the bagels turn Bake until golden brown, rotating the tray halfway through to ensure even browning. Pro Tip: To test whether the bagels are ready, tap the bottom of one—if it sounds hollow, they’re done!
- Final TipsLet the bagels sit on a wire rack for 10–15 minutes so the crust can set and the inside doesn’t turn gummy. Serve warm or store for later use (see storage tips).