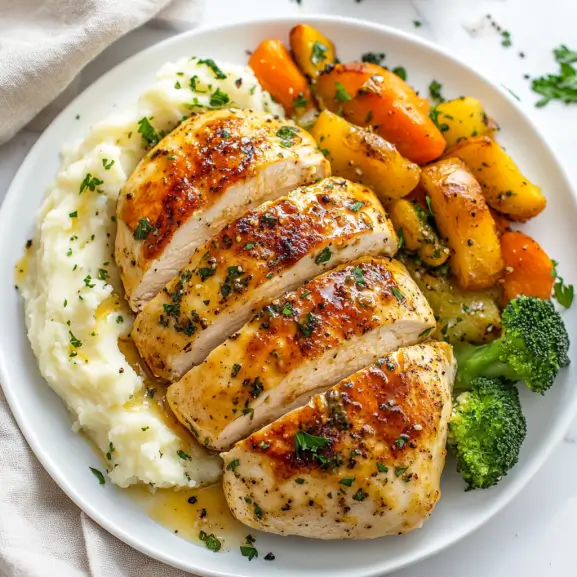
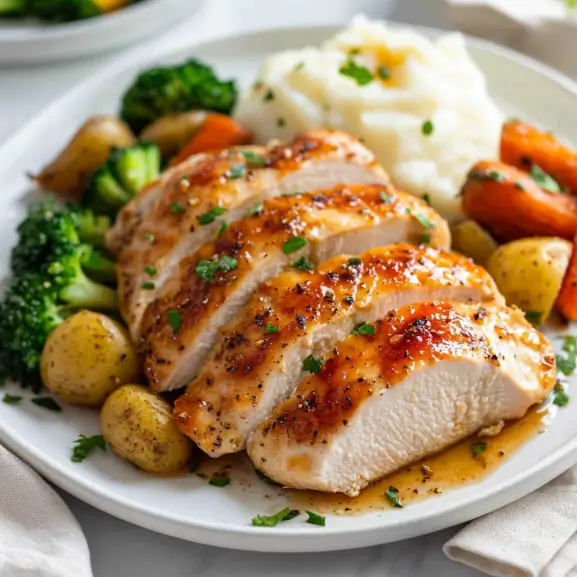
Baking thin chicken breasts should be quick and easy, right? But if you’ve ever pulled a pan of chicken out of the oven only to find it dry, rubbery, or flavorless, you’re not alone.
The truth is, thin chicken breasts cook fast, and just a few minutes too long can make or break your meal. So, how do you ensure they turn out juicy, tender, and packed with flavor every time?
Here’s the secret: It’s not just about baking time—it’s about using the right temperature, preparation techniques, and a few pro tips to lock in moisture.
In this guide, you’ll learn:
- Exact baking times at different oven temperatures
- The best temperature for juicy, flavorful results
- The #1 mistake that dries out chicken—and how to avoid it
- Pro cooking techniques chefs use to keep chicken moist
Whether you’re meal prepping or making a quick weeknight dinner, this foolproof guide will help you bake thin chicken breasts to perfection—every single time. Let’s get started!
Table of Contents

How Long to Bake Thin Chicken Breast at Different Temperatures?
Here’s a quick reference guide to ensure perfectly cooked thin chicken breasts at different oven temperatures:
| Oven Temperature | Baking Time | Best For |
|---|---|---|
| 350°F (175°C) | 20-25 minutes | Soft texture, meal prep |
| 375°F (190°C) | 18-22 minutes | Balanced juiciness |
| 400°F (205°C) | 15-20 minutes | Best for juicy, golden chicken |
| 425°F (218°C) | 12-18 minutes | Fast cooking, light crispiness |
To ensure the chicken is fully cooked, use a meat thermometer and check that the internal temperature reaches 165°F (75°C) before removing it from the oven. The USDA recommends this temperature to prevent foodborne illnesses. For a full list of safe cooking temperatures, refer to the USDA Safe Minimum Internal Temperature Chart
How to Bake Frozen Chicken Breast Without Thawing?
Cooking frozen chicken breast in the oven is completely safe and convenient—you just need to adjust the cooking time and temperature to ensure juicy, well-cooked meat.
How Long to Bake Frozen Chicken Breast?
If you’re baking frozen chicken breast, increase the usual cooking time by 50% compared to fresh chicken. Here’s a quick guide:
| Oven Temperature | Baking Time (Frozen Chicken) |
|---|---|
| 350°F (175°C) | 30-35 minutes |
| 375°F (190°C) | 28-33 minutes |
| 400°F (205°C) | 25-30 minutes |
| 425°F (218°C) | 22-28 minutes |
Pro Tip: Always check the internal temperature with a meat thermometer. The chicken is safe to eat when it reaches 165°F (75°C) in the thickest part.
Best Tips for Baking Frozen Chicken Breast
✔ Use a foil cover for the first half of baking – This helps retain moisture and prevent dryness.
✔ Season the chicken before baking – Even when frozen, adding spices, salt, or a light marinade enhances flavor.
✔ Baste with butter or olive oil halfway through** – This keeps the meat tender and juicy.
✔ Avoid thick frozen pieces – If your chicken breasts are very thick, consider slicing them in half before freezing for more even cooking.
Can You Cook Frozen Chicken Breast in an Air Fryer?
Yes! The air fryer is a great alternative for cooking frozen chicken breasts quickly.
- Preheat the air fryer to 375°F (190°C).
- Place the frozen chicken breasts in a single layer.
- Cook for 10 minutes, then flip and cook for another 10-15 minutes.
- Check that the internal temperature reaches 165°F (75°C) before serving.
This method gives juicy, slightly crispy chicken in less time than baking!
What’s the Best Temperature for Baking Thin Chicken Breast?
The ideal temperature is 400°F (205°C) for the juiciest results!
Why?
Faster cooking time = Less moisture loss
Golden, lightly crispy exterior (without drying out the inside)
Even cooking for tender, juicy chicken
Pro Tip: For extra juiciness, cover the chicken loosely with foil for the first 10 minutes, then uncover for the final 5 minutes for a light golden color.
Chef’s Secret: The Ultimate Trick for Juicy Chicken Every Time!
Want to take your baked chicken breast to the next level? Try these chef-approved techniques that most home cooks don’t know!
1. The Mayo Trick: Locks in Moisture & Boosts Flavor
Instead of just brushing your chicken with oil, coat it with a thin layer of mayonnaise before baking.
✔ Why It Works:
Seals in moisture → Prevents the chicken from drying out
Creates a light, golden crust without breadcrumbs
Enhances flavor without overpowering seasoning
How to Do It:
- Mix 1 tbsp of mayo with a pinch of garlic powder & paprika
- Rub a thin layer on both sides of the chicken
- Bake as usual—no need to add extra oil!
2. Dry Brining: Restaurant-Level Juiciness in Minutes
Most people think brining means soaking in water, but dry brining is a faster, cleaner way to get insanely juicy chicken.
✔ Why It Works:
Draws out natural juices, then reabsorbs them = ultra-moist chicken
Creates a subtle, deeper flavor in just 15 minutes
No mess, no extra bowls of liquid to deal with!
How to Do It:
- Sprinkle 1/2 tsp salt per chicken breast on both sides
- Let it sit for 15-30 minutes uncovered at room temp
- Pat dry, season as usual, and bake!
3. The Butter Baste: Michelin-Star Moisture Hack
Halfway through baking, baste the chicken with melted butter for next-level flavor and juiciness.
✔ Why It Works:
Butter adds richness and prevents moisture loss
Creates a lightly crispy golden finish
Infuses seasoning deeper into the meat
How to Do It:
- Melt 1 tbsp butter with garlic & herbs
- After 10 minutes of baking, brush it over the chicken
- Bake for the final 5-10 minutes to lock in the flavor
Final Pro Tip: Let It Rest—Seriously!
No matter which method you use, ALWAYS let chicken rest for 5 minutes before slicing.
✔ Why?
Slicing too soon = juices leak out = dry chicken. Letting it rest redistributes moisture, keeping every bite perfectly juicy.
💡 Now you have the secrets top chefs use! Try these pro hacks and transform your baked chicken into a five-star meal!
Which tip are you most excited to try? Let me know in the comments below!
How to Keep Thin Chicken Breast from Drying Out?
Follow these simple tricks to lock in moisture and flavor:
✔ Pound to even thickness → Ensures uniform cooking, prevents dry edges
✔ Brine for 15 minutes → Mix 1 tbsp salt per cup of water for ultra-juicy chicken
✔ Use olive oil or butter → Lightly coat the chicken to prevent moisture loss
✔ Rest before slicing → Wait 5 minutes after baking to let juices redistribute
Bonus Tip: Want extra tenderness? Marinate chicken in Greek yogurt or buttermilk for at least 30 minutes before baking!

One way to keep chicken breast juicy is by adding a flavorful sauce or topping. For example, this Alice Springs Chicken Recipe features honey mustard, mushrooms, and cheese for an extra burst of moisture and taste
Baked vs. Grilled vs. Air-Fried Chicken Breast: Which is Best?
| Cooking Method | Pros | Cons |
|---|---|---|
| Baked | Even cooking, easy prep | Can dry out if overcooked |
| Grilled | Smoky flavor, crispy edges | Needs an outdoor grill |
| Air-Fried | Fast, crispy texture, less oil | Small cooking space, needs flipping |
Verdict: Baking at 400°F (205°C) is the best hands-off method for juicy, flavorful chicken!
Common Mistakes When Baking Thin Chicken Breast (And How to Fix Them!)
Avoid these mistakes for perfectly cooked chicken every time:
❌ Overcooking → Always check the temperature at 12-15 minutes
❌ Skipping seasoning → Even just salt & pepper enhances flavor
❌ Using cold chicken → Let sit at room temp for 15 minutes before baking
❌ Cutting too soon → Rest for 5 minutes to keep juices inside
FAQ: Your Chicken Baking Questions Answered
Do I Cover Chicken When Baking?
Covering chicken while baking depends on the desired outcome.
Covering with foil helps retain moisture, preventing the chicken from drying out.
Baking uncovered allows the chicken to develop a light golden crust.
For the best results, cover the chicken for the first 10 minutes, then uncover for the remaining time to balance moisture retention and texture.
How Long to Cook Chicken Breast at 400°F in the Oven?
Thin chicken breasts should be baked at 400°F (205°C) for 15 to 20 minutes. The exact cooking time depends on the thickness of the chicken.
To ensure the chicken is fully cooked, use a meat thermometer and check that the internal temperature reaches 165°F (75°C).
Do You Cook Chicken at 180°C or 200°C?
The best temperature depends on the cooking method and desired texture.
At 180°C (350°F), chicken cooks more slowly, which can help retain tenderness but may increase the risk of dryness if left too long.
At 200°C (400°F), chicken cooks faster while keeping the inside juicy and the outside slightly golden.
For thin chicken breasts, 200°C (400°F) is the better option for a balance of tenderness and efficiency.
How Do I Make Baked Chicken Breast Taste Better?
If your baked chicken breast feels bland, try these flavor-boosting techniques:
✔ Marinate for at least 30 minutes → Use lemon juice, olive oil, garlic, and herbs
✔ Use a dry rub before baking → Mix paprika, garlic powder, onion powder, and salt for a deep, savory taste
✔ Butter baste halfway through baking → Adds moisture and a rich, restaurant-style finish
✔ Finish with a squeeze of lemon → Enhances flavor and adds brightness
Pro Tip: A simple blend of olive oil, minced garlic, smoked paprika, and honey creates an irresistible caramelized crust!
Should I Bake Chicken Covered or Uncovered?
It depends on your goal!
✔ Covering the chicken (with foil for the first half of baking):
Retains moisture → Prevents the chicken from drying out
Helps infuse seasonings deeper into the meat
✔ Baking uncovered (for the entire process or towards the end):
Creates a light, golden crust → Adds texture
Ideal for those who prefer a slightly crispier bite
Best Method: Cover for the first 10 minutes, then uncover for the rest of the bake time for perfect juiciness + a light golden finish!
Should I Cover Chicken Breast with Foil When Baking?
Covering chicken with foil can help lock in moisture, especially in high-temperature baking.
If a soft and juicy texture is preferred, cover the chicken for the first half of the baking time.
If a slightly crispier surface is desired, bake uncovered for the entire duration.
At 425°F (218°C), covering the chicken for the first 10 minutes and then uncovering it for the final minutes helps prevent excessive dryness while allowing light browning.
Is 20 Minutes in the Oven for Chicken Enough?
At 400°F (205°C), 20 minutes is generally sufficient for thin chicken breasts. However, factors such as thickness, oven performance, and starting temperature may affect the cooking time.
To ensure food safety, always check that the internal temperature reaches 165°F (75°C) before serving.
Do You Flip Chicken Breast in the Oven?
Flipping chicken breast during baking is not necessary, as heat circulates evenly in most ovens.
However, flipping may be beneficial in the following cases:
If baking at very high temperatures, flipping halfway through may promote even browning.
If the oven has uneven heating, turning the chicken once can prevent one side from drying out.
For most standard baking methods, flipping is not required.
Is It Better to Bake Chicken Slow or Fast?
he ideal cooking speed depends on the texture and moisture level desired.
Baking at a lower temperature, such as 350°F (175°C), results in a more gradual cook, which can be beneficial for retaining moisture. However, prolonged baking time increases the risk of dryness.
Baking at a higher temperature, such as 400°F (205°C) or 425°F (218°C), reduces cook time while keeping the chicken juicy and tender.
For thin chicken breasts, baking at 400°F is the most effective method for a balance of moisture and texture.
Which Mode is Best for Chicken in the Oven?
The best oven mode for baking chicken depends on the desired result.
Conventional baking, where heat comes from both the top and bottom elements, provides even cooking and is the best choice for moist chicken.
Convection baking, which uses a fan to circulate air, speeds up cooking and enhances browning. If using this setting, reduce the oven temperature by 25°F (15°C) to prevent overcooking.
For a slightly crispy finish, switching to broil mode for the last two minutes of baking can create a lightly golden exterior.
Nutritional Information for Baked Thin Chicken Breast
How Healthy Is Baked Chicken Breast?
Baked chicken breast is an excellent high-protein, low-fat option for a balanced diet. Here’s the approximate nutritional breakdown per 4-ounce (113g) serving of plain baked thin chicken breast:
| Nutrient | Amount (Per 4 oz Serving) |
|---|---|
| Calories | 120-150 kcal |
| Protein | 26-30g |
| Total Fat | 2-4g |
| Saturated Fat | 0.5-1g |
| Cholesterol | 65-75mg |
| Sodium | 50-80mg (without added salt) |
| Carbohydrates | 0g |
💡 Tip: If you season your chicken with olive oil, butter, or marinades, the fat and calorie content will increase.
Health Benefits of Baked Chicken Breast
- High in protein → Supports muscle growth and recovery
- Low in fat → Great for weight management
- Rich in essential vitamins like B6 and niacin for metabolism
Final Thoughts: Bake Thin Chicken Breast Like a Pro!
Key Takeaways:
✔ 400°F (205°C) for 15-20 min = Best balance of speed & juiciness
✔ Use a meat thermometer = 165°F (75°C) ensures perfect doneness
✔ Brining, resting, and seasoning = Simple tricks for moist, flavorful chicken
Now it’s your turn! What’s your go-to trick for juicy baked chicken? Have you tried the mayo rub method? Drop a comment below and let’s swap kitchen secrets!


How Long To Bake Thin Chicken Breast? The Ultimate Guide
Ingredients
- 2 thin chicken breasts
- 1 tablespoon olive oil
- 1 teaspoon salt
- ½ teaspoon black pepper
- ½ teaspoon garlic powder
- ½ teaspoon paprika
- 1 tablespoon lemon juice optional
Instructions
- Preheat oven to 400°F (205°C).
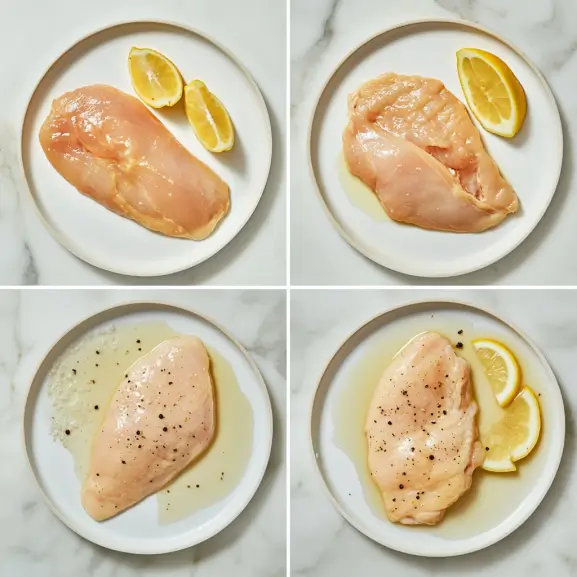
- Pound chicken breasts to an even thickness to ensure even cooking.
- Season both sides with salt, pepper, garlic powder, and paprika.
- Lightly coat with olive oil and lemon juice for extra moisture.
- Place chicken on a parchment-lined baking sheet.
- Bake for 15-20 minutes, or until the internal temperature reaches 165°F (75°C).
- Remove from the oven and let the chicken rest for 5 minutes before slicing.


1 thought on “How Long To Bake Thin Chicken Breast? The Ultimate Guide”